Setting the menu
Introduction
The main navigation has some nuances to be considered. Following are the steps required to setup the theme as showcased in the Demo website
Main steps
- Create a menu and add items, and click on "Save menu". If you have imported sample content, you will already have a menu created so you can skip to step 2.
- Click on "Manage locations" tab and make sure correct menus are assigned for main navigation and footer navigation.
Setting icons
-
Each menu item can be assigned any of the 500+ icons from the Font Awesome library icons list.
Click on "Screen options" link on the top right part of the screen and make sure the "Description" checkbox is selected (Screenshot 9):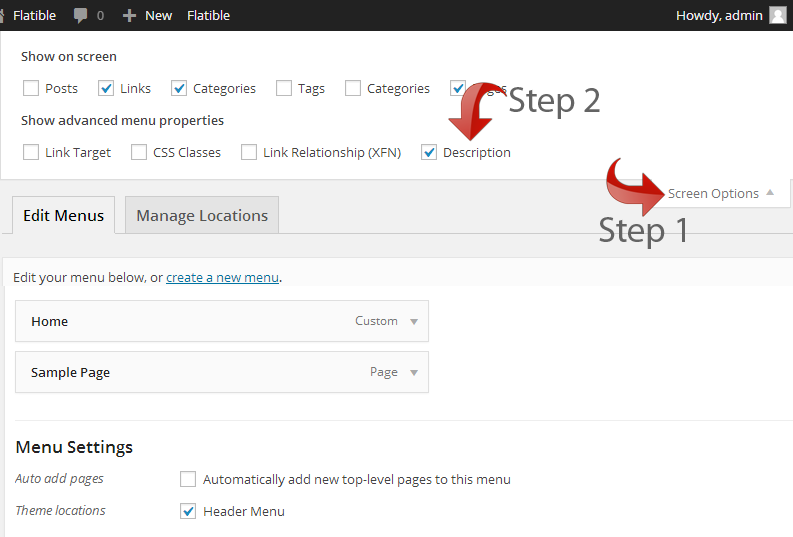
Screenshot 9: Screen options -
Go to Font awesome website, choose an icon, copy its name
and paste into "description" field which will appear for each menu item (Screenshot 10).
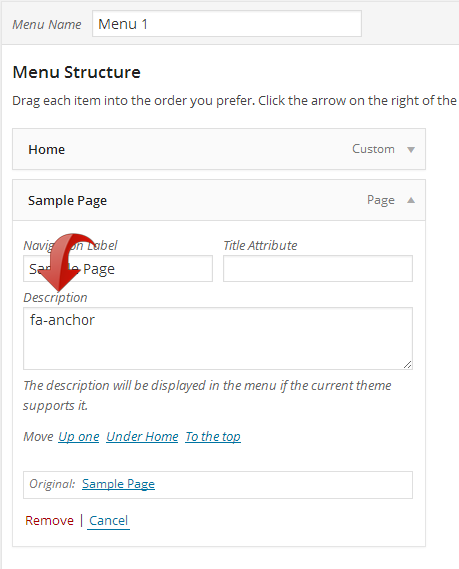
Screenshot 10: Menu icons set in description field
Menu options
- Head on to Appearance => Viral News => Header section in your admin panel and check the "Menu settings" block. Here you can choose between sticky/non-sticky menu types.
Menu styling
- Go to Appearance => Customize section in your admin panel and click on "Main navigation styling" tab. You can change lot of parameters from here and check the changes live.